How to Build a Tile-Top Outdoor Table with a Steel Base
Create a durable, stylish outdoor table by combining a tiled top with a strong steel frame.

Build a Tile-Top Outdoor Table with a Steel Base
Combining a ceramic tile top with a steel base is a practical way to create an outdoor table that is both stylish and long-lasting. This project blends basic metalworking and tiling skills into a single build that can serve as the focal point for your patio or deck.
Why Choose a Tile-Top Steel Table?
A tile-top outdoor table offers durability, easy maintenance, and creative design options, while a steel base provides the strength to support the additional weight of tile and mortar. Together, they form a table that can stay outside through changing seasons with minimal upkeep when properly built and sealed.
- Tile resists spills, heat from hot dishes, and everyday wear better than many wood finishes.
- Steel framing resists sagging and movement that can crack tiles, especially on larger tables.
- The combination allows for a modern, industrial look that pairs well with many outdoor styles.
Planning the Size and Style
Before buying materials, decide how the table will be used and where it will sit. The final size should work with your chairs, fit the space comfortably, and leave enough room to move around the table.
- Measure your outdoor area and leave at least 75–90 cm (30–36 in.) of clearance around all sides for chairs and walking space.
- Decide whether the table will be used mainly for dining, as a coffee table, or as a side table, then choose dimensions to match that purpose.
- Check the weight implications if you plan to move the table often; steel and tile together can become quite heavy.
Common Outdoor Table Dimensions
| Table Type | Typical Length | Typical Width | Comfortable Height |
|---|---|---|---|
| Dining table (4–6 people) | 140–180 cm (55–71 in.) | 80–95 cm (31–37 in.) | 72–76 cm (28–30 in.) |
| Coffee table | 90–120 cm (35–47 in.) | 45–60 cm (18–24 in.) | 40–50 cm (16–20 in.) |
| Side or end table | 40–60 cm (16–24 in.) | 40–60 cm (16–24 in.) | 50–65 cm (20–26 in.) |
Choosing Materials for Outdoor Durability
Every component of the table needs to handle sun, moisture, and temperature changes. Select materials that are intended for exterior use so the table does not deteriorate prematurely.
- Steel tubing: Use square or rectangular hollow sections, typically 25–40 mm (1–1.5 in.) thick wall tubing, for legs and aprons.
- Tile: Choose outdoor-rated porcelain or ceramic tiles with low water absorption rather than indoor-only options.
- Substrate: Use cement backer board or another rigid, moisture-resistant board as the base for the tiles.
- Mortar and grout: Use thin-set mortar and grout rated for exterior use; consider flexible or polymer-modified products to tolerate movement.
- Finish: Protect steel with a rust-inhibiting primer and exterior paint or powder coating, and seal grout with an appropriate outdoor sealer.
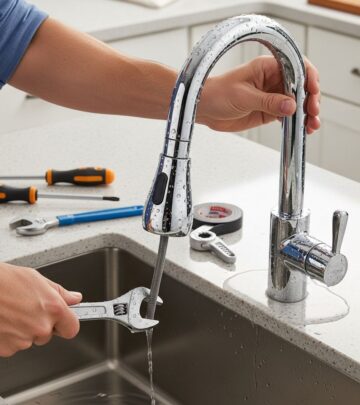
Tools and Safety Equipment
This project involves cutting and welding steel, cutting tile, and handling cement-based products. Prepare the right tools and prioritize safety before starting.
- Metal cut-off saw, angle grinder with cutting and flap discs, or a bandsaw suitable for metal.
- MIG, flux-core, or stick welder with compatible wire/rods for your steel thickness.
- Drill and bits for metal; clamps and a square for accurate assembly.
- Tile cutter or wet saw, notched trowel, grout float, sponge, and buckets.
- Personal protective equipment: welding helmet, safety glasses, gloves, hearing protection, and a proper respirator when cutting or grinding.
Designing the Steel Base
The steel base needs to support the top, resist racking, and distribute weight evenly so the tile field does not flex. A simple rectangular frame with cross-bracing is usually adequate for most patio tables.
- Plan for four legs connected by perimeter aprons that form a rigid rectangle under the tabletop.
- Add at least one cross brace or a grid of braces under the tile substrate to minimize deflection.
- Keep the top of the steel frame level and square, as any twist or sag will be visible in the tile layout.
Suggested Steel Layout
- Use heavier tubing (for example, 40 x 40 mm) for the legs and lighter tubing (25 x 25 mm) for the aprons.
- Weld aprons flush with the inside of the legs so the outside faces create a clean, uninterrupted profile.
- Design small tabs or angles welded inside the upper frame to support the cement backer board.
Cutting and Assembling the Steel Frame
Accurate cuts and careful tack-welding help keep the frame square. Simple jigs or even a flat, heavy work surface will reduce twist in the base.
- Cut the legs and aprons: Cut four legs to your chosen table height, then cut the long and short aprons to length, accounting for joint style (for example, butt joints at the corners).
- Prepare the joints: Clean mill scale and rust from weld areas with an abrasive disc and bevel thicker joints slightly for better penetration.
- Tack-weld the rectangles: Assemble two identical rectangles using two legs and two aprons each. Tack at the corners and adjust until diagonals match and corners are square.
- Join the rectangles: Connect the two end frames with the remaining aprons to form the full base, tacking and checking for square as you go.
- Add cross braces and supports: Fit and tack-weld braces across the top frame to support the tile substrate, making sure they sit in the same plane.
- Finish welds: Once everything is straight and square, complete the welds in short passes to reduce distortion.
Smoothing, Cleaning, and Protecting the Steel
Once welding is complete, spend time on surface preparation. A clean, smooth frame will hold up better and accept a more attractive finish.
- Grind exposed welds where a cleaner appearance is needed, but leave structural welds slightly proud if they are hidden from view.
- Round over sharp corners and edges to avoid snagging clothing or causing injury.
- Degrease the steel, remove rust with a wire wheel or abrasive pad, and wipe off dust before priming.
Finishing Options for the Steel Base
The finish you choose affects both appearance and corrosion resistance. For DIY projects, paint is usually the easiest route, but powder coating offers a more durable option when available.
- Painted finish: Apply a rust-inhibiting metal primer followed by two coats of high-quality exterior enamel or epoxy paint.
- Powder coating: If you have access to a powder coating service, this provides a tough, even finish that resists chipping and UV better than many paints.
- Color choice: Dark, neutral colors like black, charcoal, or deep bronze tend to complement most tile designs and outdoor furniture.
Preparing the Tile Substrate
The tile substrate is the hidden layer that carries the tile and mortar. It must be rigid, flat, and properly supported across the entire span of the table.
- Cut the backer board: Size the cement backer board to fit inside the upper perimeter of the steel frame, leaving a small clearance gap on all sides for expansion.
- Support edges and center: Ensure that the entire perimeter of the board rests on steel supports, with additional cross braces under any large spans.
- Secure the board: Pre-drill holes through the board and into the supports, then fasten using corrosion-resistant screws or suitable anchors.
- Seal exposed edges: Brush or roll on a waterproofing membrane or exterior sealer on the edges and underside of the board to reduce moisture absorption.
Selecting and Laying Out the Tiles
Tile choice defines the style of your table. Patterns can range from a simple grid to a detailed mosaic, but the layout should be planned before mixing any mortar.
- Dry-lay tiles on the substrate to test the pattern and verify how the tiles align with the table edges.
- Center the layout visually, then adjust joint widths or trim tiles near the border to avoid narrow slivers.
- Mark reference lines across the board using a straightedge and pencil to guide straight joints.
Setting the Tile on the Tabletop
Proper installation techniques help prevent loose tiles and cracked grout, especially outdoors. Working in manageable sections makes the process easier.
- Mix thin-set mortar: Prepare the mortar according to the manufacturer’s instructions, aiming for a creamy, spreadable consistency.
- Spread mortar: Use a notched trowel to apply a uniform layer, holding the trowel at a consistent angle to create even ridges.
- Place tiles: Set tiles firmly into the mortar, twisting slightly to collapse the ridges. Use spacers to maintain consistent grout lines.
- Check level: Monitor the surface with a straightedge and level as you work, adjusting tile height before the mortar begins to set.
- Clean joints: Remove excess mortar from joints and edges with a small tool or damp cloth before it hardens.
Grouting and Sealing the Tiled Surface
Once the mortar cures, grout locks the tiles together and creates a finished appearance. Sealing helps the grout resist stains and moisture.
- Apply grout: Mix grout to the correct consistency and use a rubber float to press it into the joints, working diagonally across the tiles.
- Clean haze: After the grout firms up, wipe the surface lightly with a damp sponge to remove residue, rinsing the sponge frequently.
- Final cleanup: Once dry, buff any remaining haze with a soft cloth until the tile surface is clear.
- Seal grout: After the grout has fully cured, apply an exterior-grade grout sealer according to instructions, paying special attention to exposed edges.
Joining the Tiled Top to the Steel Base
The tiled panel can be secured to the base in several ways, depending on whether you want it removable. Most builders use mechanical fasteners so the top can be replaced or repaired later.
- Install small steel angles or tabs inside the frame to screw into the underside or edge of the backer board.
- Use corrosion-resistant screws that will not rust or stain the tile or grout.
- Allow for a slight gap between the tile edge and the steel frame; this can be filled with flexible caulk if desired to reduce rattling.
Optional Design Enhancements
Once the basic structure is complete, you can customize the look and function of your table. Small additions can bring a professional touch to the finished project.
- Add a lower shelf by welding an additional frame between the legs and installing wooden or metal slats.
- Incorporate decorative elements into the base, such as curved braces, cutouts, or contrasting colors.
- Use accent tiles or a border pattern near the table edges to create visual interest.
Long-Term Care and Maintenance
Even with durable materials, outdoor furniture benefits from occasional maintenance. A few simple habits will keep the table looking good and extend its life.
- Clean the tile periodically with mild soap and water rather than harsh chemicals that can degrade the sealer.
- Inspect the steel base annually for chipped paint, rust spots, or loose fasteners, touching up as needed.
- Reapply grout sealer according to product recommendations, especially if the table is exposed to heavy rain or direct sun.
- Use coasters or trivets for very hot items to avoid thermal shock to the tiles.
Frequently Asked Questions
Can this table stay outside all year?
Yes, as long as you use exterior-grade materials, seal the grout properly, and protect the steel from rust, the table can remain outdoors year-round in many climates. In regions with severe freeze–thaw cycles, covering the table or moving it under a shelter during winter will help prolong its lifespan.
What type of tile is best for this project?
Porcelain tile is often preferred because it absorbs very little water and holds up well to outdoor conditions. If you choose ceramic tile, make sure it is rated for exterior use and consider a slightly textured surface to reduce slipperiness when wet.
Do I need advanced welding skills?
Basic welding skills are usually sufficient if you work carefully and test fit parts as you go. Practice on scrap pieces to dial in your welder settings and bead control before working on the actual frame, and always follow correct safety procedures.
Can I build this table without welding?
It is possible to build a similar table using bolted steel or a wooden base, but welded joints typically offer greater rigidity for a tile top. If you prefer not to weld, use heavy-duty brackets and bolts rated for outdoor use and ensure the frame is well braced against racking.
How heavy will the finished table be?
The weight depends on the size, thickness of the steel, and the type of tile, but expect a substantial piece of furniture that may require two people to move. The extra mass is an advantage outdoors because it resists tipping and wind, but you should plan the table location carefully before final assembly.
Turning a Project into a Patio Centerpiece
A tile-top outdoor table with a steel base blends function, durability, and creativity into a single project. By carefully planning the design, using weather-appropriate materials, and paying attention to details such as surface preparation and sealing, you can build a table that looks as good as it performs and becomes a long-term fixture in your outdoor living space.
Similar Articles
Read full bio of medha deb


