Can You Paint Over Stain? A Complete Guide
Learn whether you can paint over stain and discover the best methods for success.
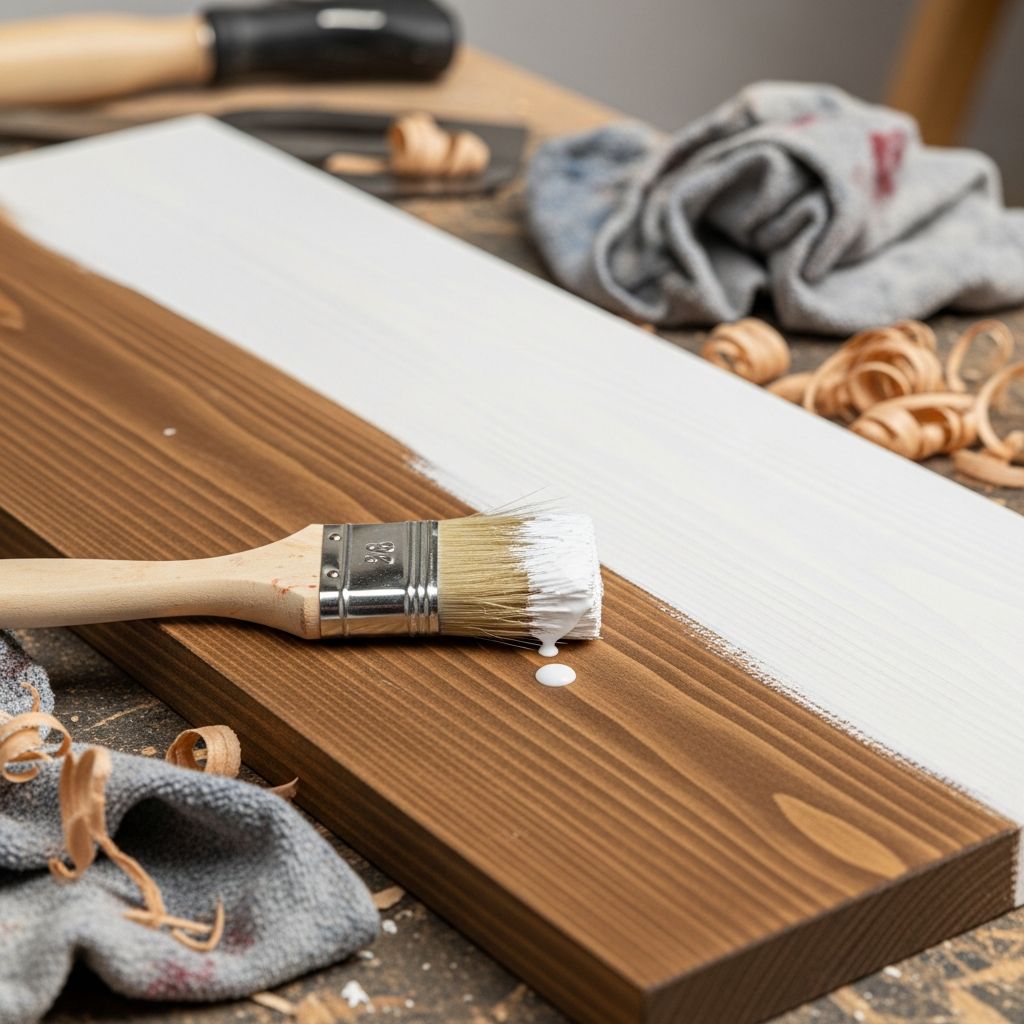
Many homeowners and DIY enthusiasts wonder whether it’s possible to paint over stain, especially when working with furniture or wood surfaces that have already been stained. The answer is yes—you absolutely can paint over stain, but success depends on proper preparation and understanding the right techniques. This comprehensive guide will walk you through everything you need to know about painting over stain, from assessment to final application.
Understanding the Challenge of Painting Over Stain
Before diving into the process, it’s important to understand why painting over stain presents unique challenges. Stain penetrates wood differently than paint does. While paint typically sits on top of the surface, stain soaks into the wood grain. This fundamental difference means that if you simply apply paint directly over stain without proper preparation, the paint may not adhere well, resulting in peeling, flaking, or an uneven finish.
Additionally, stain can create a slick surface that makes adhesion difficult for water-based or latex paints. The key to success is creating a surface that allows the paint to grip properly while also sealing in the stain color to prevent it from bleeding through your new paint finish.
Assessing Your Stained Surface
The first step in any painting project is assessing the current condition of the stained surface. Take time to examine the wood carefully and ask yourself several important questions:
- Is the stain finish still in good condition, or is it peeling and damaged?
- How old is the stain, and has it faded over time?
- Is the surface clean and free of dust, dirt, and debris?
- Are there any gaps, cracks, or areas of damage that need repair?
- Has the wood been sealed with a topcoat such as polyurethane or varnish?
Understanding the current state of your surface will help you determine which preparation steps are necessary and which painting techniques will work best for your project.
Preparation: The Foundation for Success
Proper preparation is absolutely critical when painting over stain. Skipping or rushing through these steps will likely result in a disappointing finish that won’t last. Here’s what you need to do:
Clean the Surface Thoroughly
Start by cleaning the stained surface completely. Use a damp cloth or TSP (trisodium phosphate) solution to remove any dirt, dust, grease, or other contaminants. Allow the surface to dry completely before moving forward. A clean surface ensures better paint adhesion and a more professional-looking result.
Light Sanding
Sanding is one of the most important steps in preparing a stained surface for painting. You don’t need to sand off all the stain—just enough to dull the surface and create some texture for the primer and paint to grip. Use 120-grit sandpaper and sand lightly in the direction of the wood grain. This process typically takes just a few minutes and requires minimal effort compared to stripping the entire finish.
After sanding, wipe down the entire surface with a lint-free cloth or slightly damp paper towel to remove all sanding dust. Any residual dust will interfere with paint adhesion and create an uneven finish.
Fill Gaps and Repair Damage
Inspect the wood for any gaps, cracks, holes, or other damage. Use wood filler appropriate for your project to repair these areas. Allow the filler to dry according to package directions, then sand smooth with 120-grit or higher sandpaper. This ensures a seamless surface before painting.
Choosing the Right Primer
Selecting an appropriate primer is absolutely essential when painting over stain. The primer serves multiple critical functions: it seals in the stain color to prevent bleeding, it provides a surface for the paint to adhere to, and it ensures consistent color coverage.
Types of Primers for Stained Surfaces
When choosing a primer, look for one specifically formulated for stain blocking and adhesion. These primers are designed to seal tough stains on a wide range of surfaces, including wood that has been previously stained or finished. A quality primer like those formulated for stain-blocking will contain ingredients that help prevent stain bleed-through and improve overall paint adhesion.
Consider the following when selecting your primer:
- Water-based vs. oil-based formulations
- Stain-blocking capability
- Adherence to glossy or sealed surfaces
- Drying time
- Coverage rate
Applying Primer
Apply the primer according to manufacturer instructions, typically using a brush or roller. Make sure to achieve full, even coverage. You may need two coats of primer, especially if the stain color is particularly dark or if you’re painting over a sealed surface. Allow proper drying time between coats as specified on the primer can.
Selecting the Right Paint
Once you’ve applied primer, you’re ready to select and apply your finish paint. The type of paint you choose will significantly impact the durability and appearance of your final result.
Paint Types and Finishes
For surfaces previously stained, consider the following paint options:
- Latex Paint: Water-based, low odor, easy to clean up, and available in almost any color imaginable
- Acrylic Paint: Durable, water-based, excellent adhesion, and quick-drying
- Oil-Based Paint: More durable and provides superior coverage but has stronger fumes and longer drying times
For most DIY projects, latex or acrylic paint combined with a quality stain-blocking primer will provide excellent results. These water-based options are less messy, have lower odor, and offer the same consistent results every time.
Paint Finish Options
Choose your paint finish based on the location and purpose of the piece:
- Flat or Matte: Hides imperfections but less durable
- Satin: Good balance of durability and appearance
- Semi-Gloss: Very durable, ideal for high-traffic areas and furniture
- Gloss: Most durable and easiest to clean
Application Techniques
Applying paint over stain requires attention to detail and proper technique to achieve professional-looking results.
First Coat Application
Apply your first coat of paint evenly with a quality brush or roller. Use long, smooth strokes and maintain a wet edge to avoid lap marks. Apply enough paint for complete coverage but avoid puddles or excessive thickness. Allow the first coat to dry completely according to paint manufacturer specifications.
Sanding Between Coats
For the smoothest finish, lightly sand between paint coats using 220-grit or higher sandpaper. This helps subsequent coats adhere better and creates a more uniform surface. Wipe away all sanding dust before applying the next coat.
Additional Coats
Most projects require two coats of paint over the primer for optimal coverage and color. Some darker or more vibrant colors may require a third coat. Apply each coat following the same technique as the first coat, allowing proper drying time between applications.
Creating a Faux Stain Finish
If you prefer the look of stain but want the benefits of paint, consider creating a faux stain finish using latex paint mixed with glaze. This technique provides excellent results without the mess and strong odors of traditional stain.
The Faux Stain Process
Begin by applying a base coat in a light shade appropriate for your desired final color. Once this dries, mix latex paint with a water-based glaze in a specific ratio to create semi-transparent layers that resemble natural wood grain. This method offers several advantages:
- Water-based formula with minimal odor
- Consistent, repeatable results
- Less messy application process
- Ability to achieve stain without sanding off existing finishes
- Wide color variety to customize your shade
Layering for Depth
The faux stain technique typically involves layering multiple thin coats. With each application, brush on the glaze mixture and dab with a cloth to create wood grain effects. Light coats allow previous layers to show through, creating depth and visual interest that mimics natural stained wood.
Protecting Your Finished Surface
Once you’ve applied your final coat of paint, protecting that finish is important, especially for furniture that will receive regular use.
Topcoat Options
Consider applying a protective topcoat based on the intended use of the piece:
- Water-Based Clear Coat: Best for high-use furniture like kitchen tables and cabinet doors
- Teak Oil or Danish Oil: Provides natural-looking finish with modest protection
- Polyurethane: Highly durable and resistant to moisture and wear
For high-traffic areas and furniture that will experience regular contact, a water-based clear coat offers superior protection and durability compared to natural oils.
Curing and Care
Allow your painted surface adequate time to cure fully before placing it into regular use. During the first few weeks, the finish may show temporary marks from cold beverages that will disappear as the paint continues to harden. This is normal and typically resolves once the paint has fully cured.
Common Mistakes to Avoid
To ensure your project turns out successfully, avoid these common pitfalls:
- Skipping Primer: Never skip the primer step—it’s essential for adhesion and stain blocking
- Inadequate Surface Preparation: Rushing through cleaning and sanding will compromise your results
- Insufficient Drying Time: Always allow adequate drying time between coats
- Using Low-Quality Materials: Invest in good-quality primer and paint for better results
- Poor Application Technique: Take your time and maintain proper technique throughout the project
- Ignoring Surface Condition: Address damage and repairs before painting
Special Considerations for Different Surfaces
Furniture
When painting stained furniture, be aware that you may not need to sand off the entire finish. Light sanding to dull the surface combined with proper primer should be sufficient. This approach preserves the structural integrity of the piece while preparing it for new paint.
Wood Trim and Baseboards
For interior wood trim that has been stained, the same principles apply. Use a stain-blocking primer and quality paint. Trim experiences more cleaning and potential moisture exposure, so consider a semi-gloss or gloss paint finish for better durability and washability.
Exterior Stained Wood
Exterior surfaces require additional considerations due to weather exposure. Use exterior-grade primer and paint specifically formulated for outdoor use. These products offer better UV protection and moisture resistance than interior products.
Frequently Asked Questions
Q: Do I need to remove all the stain before painting?
A: No, you don’t need to remove all the stain. Light sanding to dull the surface, combined with a quality stain-blocking primer, is usually sufficient for successful paint adhesion.
Q: What’s the best primer for painting over stain?
A: Use a primer specifically formulated for stain blocking and adhesion. These primers are designed to seal tough stains and provide excellent coverage on previously finished surfaces.
Q: How long should I wait between coats?
A: Follow the manufacturer’s recommendations on your specific primer and paint products. Most latex products require 2-4 hours between coats, while oil-based products may require longer.
Q: Can I paint over gel stain?
A: Yes, you can paint over gel stain using the same process: clean, sand lightly, prime with a stain-blocking primer, and apply paint.
Q: Will stain bleed through my paint?
A: With proper primer application, stain should not bleed through. A quality stain-blocking primer specifically seals in stain colors to prevent bleeding.
Q: How many coats of paint do I need?
A: Most projects require two coats of paint for complete coverage and consistent color. Some dark or vibrant colors may need a third coat.
Q: Is it better to paint or stain furniture?
A: Both have advantages. Paint offers more color options and easier application, while stain highlights natural wood grain. Your choice depends on your desired aesthetic and the piece’s condition.
References
- How to Apply Paint that Looks Like Stain — Renovated Faith. Accessed December 2025. https://renovatedfaith.com/paint-that-looks-like-stain/
- HGTV Home by Sherwin-Williams Launches New Primers — Coatings World. Accessed December 2025. https://www.coatingsworld.com/breaking-news/hgtv-home-by-sherwin-williams-launches-new-primers/
- Showcase® Interior Paint & Primer — HGTV Home by Sherwin-Williams. Accessed December 2025. https://www.hgtvhomebysherwinwilliams.com/en/paints/showcase-interior-paint-primer
Similar Articles








Read full bio of medha deb