Filling Paver Joints with Sand: Complete Guide
Master the art of filling paver joints with sand for durable, weed-resistant patios and walkways that last for years.
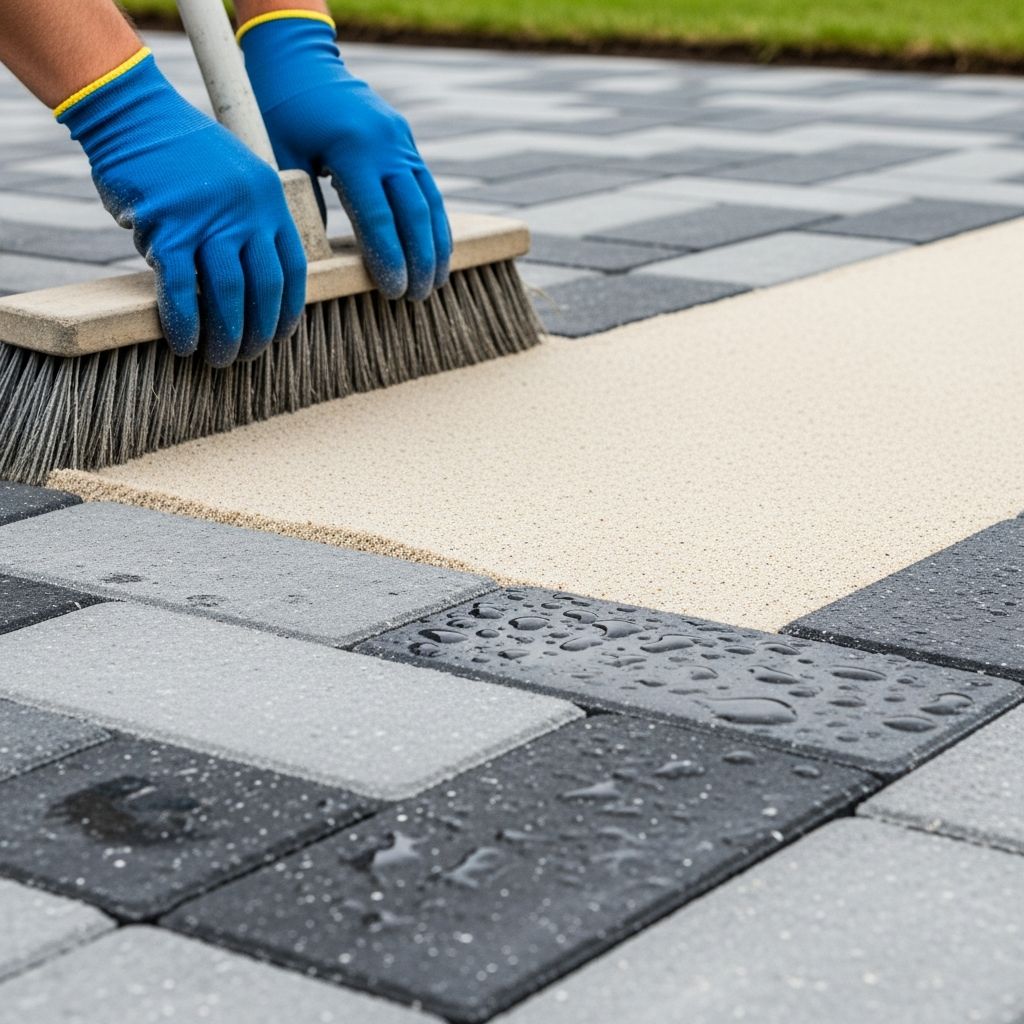
Joint sand serves as the essential binding element in paver installations, locking units together while allowing slight flexibility to handle ground movement and loads. Properly applied sand prevents shifting, inhibits weed growth, and enhances overall durability of patios, walkways, and driveways.
Understanding Joint Sand Types
Selecting the right sand is crucial for project success. Traditional masonry sand provides basic stability but requires frequent reapplication due to erosion from rain and foot traffic. In contrast,
polymeric sand
incorporates fine polymers that activate with water, forming a solid, flexible binder resistant to washing out.- Masonry Sand: Coarse, angular grains interlock mechanically; ideal for new installations over bedding sand layers but less effective long-term in exposed areas.
- Polymeric Sand: Fine texture with additives; hardens into a grout-like seal, blocking insects and weeds while permitting drainage.
- Key Differences: Polymeric versions excel in high-traffic zones and climates with heavy rain, offering up to 20% stronger joints post-compaction.
For optimal performance, match sand type to paver design—avoid polymeric in joints narrower than 1/8 inch or notched edges where full penetration is impossible.
Essential Tools and Materials
Gather these items before starting to streamline the process:
| Category | Item | Purpose |
|---|---|---|
| Materials | Polymeric or jointing sand | Fills and stabilizes joints |
| Tools | Stiff bristle broom, soft brush | Sweeping sand into gaps |
| Equipment | Vibratory plate compactor (min. 5,000 lbs force) | Settles sand deeply |
| Cleaning | Shop vac, leaf blower, pressure washer | Removes debris and excess |
| Safety | Goggles, gloves, dust mask | Protects during dusty compaction |
| Activation | Garden hose with shower nozzle | Wets polymeric sand evenly |
Rent compactors from equipment suppliers for large areas; protective mats prevent paver damage.
Preparing the Paver Surface
A clean, dry base is non-negotiable. Debris or moisture leads to weak joints and failures.
- Clear Existing Fill: For retrofits, remove old sand fully using a pressure washer or stiff tool down to paver bottoms. Wear protective gear as this creates mess.
- Weed and Debris Removal: Pull weeds, vacuum joints with shop vac, and inspect for cracks or chips needing repair.
- Dry Thoroughly: Ensure zero moisture; polymeric sand requires dry conditions for proper binding. Wait 24 hours post-rain.
- Edge Protection: Tape adjacent soft surfaces to contain sand.
Sweep the entire area meticulously. Test a small section if reusing polymeric sand on older installs.
Step-by-Step Sand Application Process
1. Distribute Sand Evenly
Avoid dumping full bags in one spot to prevent polymer separation. Spread over 50 sq ft sections, sweeping into joints with a mix of stiff and soft brooms for full penetration.
- Work in small batches to maintain mix integrity.
- Fill joints to full depth, avoiding overfilling.
2. Initial Consolidation
Tap pavers lightly with a broom handle to settle sand, then make preliminary sweeps. This step ensures no air pockets form deeper in joints.
3. Compaction for Strength
Place a protective mat or plywood over pavers. Run the compactor in two perpendicular passes at minimum 5,000 lbs force. Repeat sweeping and compacting until joints reach full height.
Compaction boosts joint strength by 20% and seats pavers firmly into bedding sand.
4. Clean Surface Thoroughly
Sweep excess to 1/8 inch below paver tops (or bevel bottoms). Vacuum residues, then blow with a leaf blower on low from waist height. No sand should remain on surfaces to avoid hazing.
5. Activate Polymeric Sand
Use a shower nozzle for gentle misting: soak 30 sq ft for 30 seconds until pooling and beading occurs, indicating activation. Repeat passes if needed, avoiding standing water. Surface is rain-safe in 15 minutes; full cure takes 24-30 days.
For regular sand, skip activation but compact extra firmly.
Common Mistakes and How to Avoid Them
DIY pitfalls can compromise longevity:
- Skipping Compaction: Leaves voids; always use proper equipment.
- Wet Installation: Causes clumping; delay for dry weather.
- Over-Sweeping: Separates polymers; limit to 10 ft distances.
- Inadequate Cleaning: Leads to haze; blow thoroughly post-compaction.
- Wrong Joint Size: Polymeric fails in <1>
Maintenance for Long-Lasting Joints
Post-install, avoid heavy traffic for 24 hours and sealing for 30 days. Reapply polymeric sand every 2-5 years based on wear. Pressure wash gently annually, refilling eroded spots promptly.
| Issue | Solution |
|---|---|
| Weed Growth | Spot-treat and refill with polymeric |
| Sand Loss | Sweep in fresh sand, compact |
| Hazing | Light acid wash per manufacturer |
Joint Sand for New vs. Existing Installations
New pavers over 4-6 inch gravel bases and 1-inch bedding sand integrate joint sand seamlessly during layout. For existing surfaces, assess stability first—lift and reset loose units before filling.
Frequently Asked Questions (FAQs)
What is the best sand for paver joints?
Polymeric sand is superior for most applications due to its binding properties, weed resistance, and durability compared to regular masonry sand.
How deep should paver joints be?
Minimum 1/8 inch wide and deep enough for full sand penetration; typically matching paver thickness for strength.
Can I install polymeric sand in the rain?
No—surface and joints must be bone-dry, with 24 hours rain-free post-activation.
How long does polymeric sand take to cure?
Rain-safe in 15 minutes, foot-traffic ready in 24 hours, full cure in 28-30 days.
Do I need a compactor for joint sand?
Yes, essential for deep settlement and interlock; hand tamping suffices only for tiny areas.
This comprehensive approach ensures your hardscape remains beautiful and functional for years, transforming outdoor spaces into reliable extensions of your home.
References
- Paver Installation Process — Belgard. 2023. https://www.belgard.com/plan-design/installation-beyond/installation/
- Applying Polymeric Sand to an Existing Patio or Walkway — Sakrete. 2023. https://www.sakrete.com/blog/post/applying-polymeric-sand-to-an-existing-patio-or-walkway/
- How To Install Polymeric Sand In Your Pavers — The DIY Playbook. 2023. https://thediyplaybook.com/install-polymeric-sand/
- Applying Polymeric Sand for Paver Joints — YouTube (Techno Metal Post). 2023-10-15. https://www.youtube.com/watch?v=Vo3Z4kA23kc
- Polymeric Sand Installation | Guide to No Failures — YouTube (Unilock). 2023. https://www.youtube.com/watch?v=E5mHXt8E3eY
- Sanding Paver Joints: Step-by-Step Guide — How to Hardscape. 2023. https://howtohardscape.com/sanding-paver-joints/
Similar Articles



Read full bio of medha deb