Designing a Home Maker Studio: Turn Any Room into a Creative Powerhouse
How to plan, furnish, and organize a modern DIY maker studio in your home

A home maker studio is more than a workbench and a box of tools. It is a dedicated environment where ideas become physical objects, where trial and error are welcome, and where skills steadily grow through hands-on experimentation. With thoughtful planning, almost any home—whether a compact apartment or a large house—can support a practical, inspiring makerspace.
This guide walks through how to design, equip, and organize a home maker studio that fits your space, interests, and budget while remaining safe, flexible, and enjoyable to use.
What Is a Home Makerspace?
A home makerspace (or maker studio) is a designated area in your living space set up for building, repairing, prototyping, and crafting. It is a cross between a workshop, an art studio, and a lab, tailored to the projects you care about most.
Unlike a traditional single-purpose shop, a maker studio is usually:
- Multi-disciplinary – able to support woodworking, electronics, sewing, 3D printing, model building, and more.
- Modular – with furniture and storage that can be rearranged as projects change.
- Community-minded – designed for collaboration with family, friends, or neighbors when needed.
Step 1: Clarify Your Maker Identity
Before buying tools or reworking a room, define what you actually want to do in your space. Your interests will drive every decision that follows, from storage to lighting.
Questions to Ask Yourself
- What types of projects do you do now (or want to try soon)?
- How often do you build—weekly, monthly, or only on big projects?
- Do you prefer loud, dusty work (woodworking, metal) or quiet, clean work (crafts, electronics)?
- Will others use the space, such as kids, roommates, or partners?
- How much can you realistically invest in tools and storage this year?
Common Home Maker Profiles
- The Repairer – focuses on fixing household items, bikes, furniture, and electronics.
- The Crafter – works with fabric, paper, vinyl, and small hand tools, often selling or gifting finished pieces.
- The Prototyper – experiments with 3D prints, robotics, and electronics, often for engineering or gaming projects.
- The Builder – leans toward woodworking, renovation tasks, and large, structural projects.
Step 2: Choose the Right Location
The best spot for a maker studio balances space, comfort, noise control, and accessibility. Different locations offer distinct strengths and trade-offs.
| Location | Best For | Advantages | Challenges |
|---|---|---|---|
| Garage | Woodworking, metalwork, large builds | Good ventilation, easy material loading, no need to protect fine finishes | Temperature swings, dust can spread, cars compete for space |
| Basement | Year-round shop, heavy tools | Noise isolation, stable temperatures, room for larger benches | Limited natural light, moisture issues, stairs for moving materials |
| Spare Room | Crafts, electronics, sewing, light assembly | Clean surfaces, climate control, easy access to power and internet | Noise and fumes must be controlled, space shared with other uses |
| Dining/Living Corner | Portable craft and hobby work | Central location, encourages frequent use, low setup cost | Must be visually tidy, minimal noisy or dusty work |
| Outdoor Shed | Seasonal woodworking or messy projects | Great for dust and fumes, separation from living areas | Security, weatherproofing, and power access are critical |
Step 3: Plan the Layout Like a Workflow
A maker studio is most enjoyable when the layout mirrors how work actually flows from one step to the next. Think in terms of stations rather than random furniture placement.
Core Zones to Consider
- Design and Planning Zone – a desk or table with a computer, sketchbook, and reference materials.
- Cutting and Shaping Zone – where sawing, sanding, drilling, or fabric cutting takes place.
- Assembly Zone – a clear surface for putting parts together, gluing, and fastening.
- Finishing Zone – for painting, staining, soldering, or detailed handwork.
- Storage Zone – for tools, raw materials, and in-progress projects.
In smaller rooms, these zones can share a single large table, but you should still mentally assign regions to each task so tools and supplies remain grouped logically.
Practical Layout Tips
- Keep the tools you use most often at arm’s reach from your main work surface.
- Position loud or dusty tools closer to doors, windows, or vents for easier cleanup and airflow.
- Leave clear walkways and avoid stacking materials where they create trip hazards.
- Plan at least one open surface where nothing is permanently installed so it can adapt to different projects.
Step 4: Select Surfaces and Furniture
The furniture in your maker studio should be tough, simple, and easy to reconfigure. Avoid surfaces that are too precious to scratch or spill on; creative work inevitably leaves marks.
Work Surfaces That Work Hard
- Sturdy main bench – a solid wood or laminate-topped bench that can handle clamping, hammering, and heavy loads.
- Secondary craft table – a smoother surface reserved for detailed work, sewing, or drawing.
- Mobile cart or island – on locking casters so you can bring tools and materials to where they are needed.
Sitting, Standing, and Adjustability
- Use an adjustable-height stool that works at both desk and bench heights.
- Consider a sit-stand setup for long sessions, especially when soldering or painting.
- Maintain good posture by keeping work at comfortable elbow height whenever possible.
Step 5: Intelligent Storage and Organization
Even a modest collection of tools and supplies can become overwhelming if there is no organization strategy. A functional maker studio relies on storage that is visible, labeled, and sized to match your gear.
Vertical and Modular Storage Ideas
- Pegboards and slat walls to hang hand tools, rulers, clamps, and safety gear where they can be seen and reached easily.
- Clear bins and drawer organizers for screws, components, beads, and small hardware with simple labels.
- Stackable totes for bulk materials such as lumber offcuts, fabrics, or recycled parts.
- Rolling tool chests if you own many hand tools and want to move them to different rooms or outdoors.
Systems That Keep Clutter Under Control
- Give every tool and category of material a defined “home” and label it.
- Reserve one bin or shelf strictly for active, in-progress projects.
- Schedule quick resets after major sessions—ten minutes of cleanup can save hours of frustration later.
Step 6: Lighting, Power, and Comfort
Good conditions make a huge difference in both safety and enjoyment. Dim light, few outlets, and poor temperature control become exhausting over time.
Layered Lighting
- Overhead ambient light to eliminate dark corners.
- Task lights with adjustable arms over benches, sewing machines, or soldering areas.
- Color-balanced bulbs if you do painting, finishing, or photography, to keep colors accurate.
Power and Connectivity
- Install or use properly-rated power strips with surge protection near workstations.
- Avoid running cords across walkways; if necessary, secure them with covers or routing channels.
- Ensure stable Wi-Fi or wired internet if you use cloud design tools, online tutorials, or smart equipment.
Comfort and Acoustics
- Add anti-fatigue mats where you stand for long periods.
- Use fans, heaters, or dehumidifiers as needed to maintain comfortable working conditions.
- Consider soft wall hangings or rugs (away from dusty or wet areas) to reduce echo and noise.
Step 7: Safety Built Into the Space
A maker studio is a place of experimentation, which means mistakes and surprises are normal. Basic safety planning greatly reduces the risk of injuries or damage.
Personal Protection Essentials
- Safety glasses or goggles for cutting, drilling, grinding, and chemical use.
- Hearing protection such as earmuffs or plugs when using loud power tools.
- Dust masks or respirators when sanding, spraying finishes, or working with fine particulates.
- Gloves suited to the task, avoiding loose-fitting styles around rotating machinery.
Space-Level Safety Precautions
- Install a fire extinguisher rated for ordinary combustibles and electrical fires, and learn how to use it.
- Keep flammable finishes and solvents in tightly closed containers away from heat sources.
- Ensure adequate ventilation when soldering, painting, or using strong adhesives.
- Store sharp and high-voltage tools out of reach if children or pets share the home.
Step 8: Essential Tool Kits by Interest
It is easy to overspend on equipment. Start with a focused core kit that matches your main interests, then expand gradually as skills and project complexity increase.
Starter Kit for General DIY and Repair
- Basic hand tools: tape measure, utility knife, adjustable wrench, screwdrivers, pliers, and hammer.
- Small power tools: cordless drill/driver, compact sander, and a multi-tool or jigsaw.
- Household supplies: fasteners, wall anchors, glues, tapes, and patch materials.
Starter Kit for Woodworking
- Measuring and marking tools: square, marking knife or pencil, and measuring tape.
- Cutting tools: handsaw or circular saw, jigsaw, and a miter box.
- Shaping and joining tools: chisels, block plane, clamps, drill/driver, and sanding blocks.
Starter Kit for Electronics and Prototyping
- Precision hand tools: small screwdrivers, flush cutters, tweezers, and wire strippers.
- Soldering station with adjustable temperature, solder, and helping-hands stand.
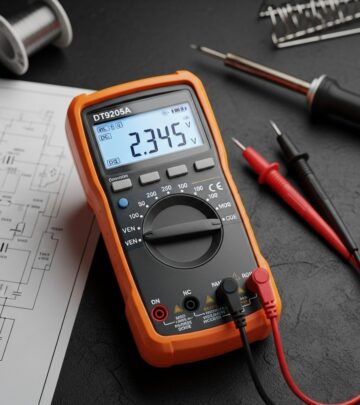
- Basic test gear: multimeter, breadboards, jumper wires, and a few microcontroller boards.
Starter Kit for Crafting and Sewing
- Cutting tools: fabric scissors, rotary cutter and mat, and craft knives.
- Measuring and layout: clear rulers, flexible tape, and pattern weights.
- Machines and accessories: a reliable sewing machine, pins, needles, and basic thread library.
Designing for Flexibility and Growth
Your first version of a maker studio will not be perfect—and that is part of the fun. The space should evolve as your projects, skills, and interests shift over time.
Strategies for an Adaptable Studio
- Use rolling carts, mobile bases, and modular shelving so zones can be rearranged with minimal effort.
- Leave at least one wall or corner underutilized to accommodate future tools or storage.
- Adopt a “try then commit” approach: test new tool placements for a few weeks before drilling permanent mounts.
Integrating Digital and Physical Making
- Keep a computer or tablet nearby for CAD, pattern design, and accessing tutorials while you work.
- Add space for 3D printers or small CNC tools as you move into digital fabrication.
- Document successful builds with photos and notes so future projects start from a stronger foundation.
Bringing Others into the Space
While a home makerspace can be a personal retreat, it can also become a hub for family learning, neighborhood collaboration, or small-scale entrepreneurship.
Family-Friendly Maker Studios
- Create a “kid zone” with age-appropriate tools and materials, clearly separated from dangerous equipment.
- Use color-coded bins or labels so children can help with setup and cleanup.
- Set simple rules for supervision, tool sharing, and cleanup routines.
Sharing Skills and Projects
- Host occasional build nights where friends or neighbors bring small projects to work on together.
- Start a project board or notebook listing in-progress builds and ideas for future experiments.
- Consider documenting select projects online if you enjoy teaching or want feedback from a wider community.
FAQs About Home Maker Studios
Do I need a large room to create a makerspace?
No. Many effective home maker studios live in compact corners, closets converted to craft nooks, or half of a garage. The keys are smart vertical storage, multipurpose furniture, and a clear boundary between “maker zone” and general living space.
How much should I budget to get started?
Costs vary widely by interest, but a functional starter setup can be created on a modest budget by reusing furniture, buying used tools, and focusing on one discipline first. Over time, you can reinvest savings from DIY repairs or sales of finished projects into better tools and storage.
What if I rent and cannot make permanent changes?
Focus on freestanding shelving, portable workbenches, and rolling carts, and avoid drilling into walls where possible. Use removable hooks and organizers, and keep any modifications reversible so you can restore the space easily when you move out.
How do I control dust and noise in a shared home?
Select quieter tools when possible, such as hand saws and sanding blocks for late-night work. Use shop vacuums or small dust collectors, and dedicate certain high-noise or high-dust activities to specific hours, ideally when other household members are out or active.
Is it worth investing in advanced digital tools like 3D printers?
Advanced tools are worthwhile if they align with your long-term interests and will see frequent use. Before investing, explore local shared makerspaces or libraries that offer access to these machines so you can learn what features matter most for your style of projects.
Final Thoughts
A home maker studio does not have to look like a professional fabrication lab to be effective. By aligning the space with your interests, planning around workflow, and prioritizing safety and comfort, you can create an environment where projects feel easier to start and more satisfying to finish. The goal is not perfection but a living space that consistently invites you to explore, experiment, and build.
Similar Articles


Read full bio of Sneha Tete


