DIY Cleaning Spray Starter Kit Guide
Create your own natural cleaning sprays at home with this comprehensive DIY starter kit guide.

DIY Cleaning Spray Starter Kit: Your Complete Guide to Homemade Cleaning Solutions
Creating your own cleaning sprays at home is not only budget-friendly but also an excellent way to reduce your environmental footprint. With just a few basic ingredients and some simple techniques, you can craft a complete starter kit of natural cleaning solutions that rival commercial products in effectiveness. This comprehensive guide will walk you through everything you need to know to get started with homemade cleaning sprays.
Why Make Your Own Cleaning Sprays?
Homemade cleaning sprays offer numerous advantages over store-bought alternatives. They are significantly more affordable, allowing you to stretch your cleaning budget further. You have complete control over the ingredients, eliminating harsh chemicals and toxic fumes that can be harmful to your family and pets. Additionally, making your own cleaners reduces plastic waste from commercial packaging, making it an environmentally responsible choice. Perhaps most importantly, natural ingredients like vinegar, baking soda, and citrus are proven to be effective at cutting through grease, grime, and buildup.
Essential Ingredients for Your Starter Kit
Before you begin creating your DIY cleaning spray collection, gather these foundational ingredients:
- Distilled white vinegar – the backbone of most natural cleaners
- Filtered water – dilutes vinegar for optimal cleaning power
- Baking soda – provides gentle abrasive action
- Dish soap – cuts through grease and grime
- Citrus peels – adds natural fragrance and cleaning properties
- Essential oils (optional) – lavender, lemon, or eucalyptus for scent and additional benefits
- Herbs such as rosemary – natural fragrance and antimicrobial properties
- Cinnamon sticks – provides pleasant aroma
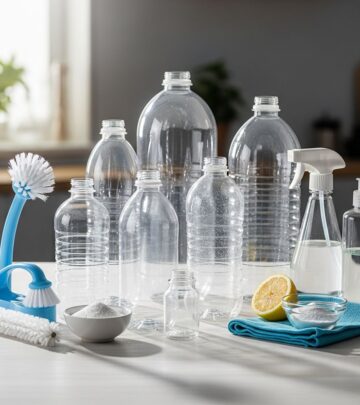
Equipment You’ll Need
Having the right tools makes the process much easier and more efficient:
- Glass jars or sealable containers – for infusing vinegar solutions
- Spray bottles – for easy application
- Funnel – helps transfer liquid without spills
- Wire mesh strainer – filters out solids
- Measuring cups and spoons – ensures proper ratios
- Labels and markers – identifies contents and dates
- Microfiber cloths – work effectively with homemade sprays
Creating Your Base Vinegar Solutions
The foundation of most DIY cleaning sprays begins with infused vinegar. Start by collecting citrus peels from oranges, lemons, limes, and grapefruits as you consume them. Place these peels in a glass mason jar along with your chosen herbs or spices. Popular combinations include lemon peels with rosemary sprigs, grapefruit peels with lavender buds, or orange peels with cinnamon sticks. Fill the jar almost to the top with distilled white vinegar and seal it tightly. Attach a label noting the date and ingredient combination, then allow the mixture to infuse for two to four weeks. During this time, the vinegar absorbs the aromatic oils and cleaning properties from the peels and herbs, creating a potent cleaning solution with a fresh, pleasant scent.
Transforming Vinegar Into Spray Form
Once your vinegar has finished infusing, it’s time to create your spray cleaners. Begin by thoroughly rinsing out a spray bottle. Fill the bottle halfway with filtered water, as this dilution maintains cleaning effectiveness while reducing the strong vinegar smell. Using a strainer and funnel, carefully pour the infused vinegar into the bottle until it’s nearly full. Screw on the spray nozzle securely. This mixture creates an all-purpose spray suitable for countertops, appliances, and most surfaces throughout your home. The beauty of this method is that while you may notice a faint vinegar aroma initially, it completely dissipates as the cleaner dries, leaving your space fresh and clean.
Specialty Spray Recipes for Different Surfaces
All-Purpose Bathroom Spray
For a powerful bathroom cleaner that tackles multiple surfaces, combine one cup of distilled white vinegar, one cup of filtered water, and one teaspoon of dish soap in a spray bottle. This formula works effectively on bathroom countertops, tile walls, toilet exteriors, and fixtures. Spray the solution generously and allow it to sit for approximately one minute to break down grime and hard water deposits. Scrub with a microfiber cloth or soft brush, then rinse thoroughly. This spray is particularly effective on shower walls and tub surfaces where soap scum accumulates.
Glass and Mirror Cleaner
Create a specialized glass cleaner by mixing equal parts vinegar and water with a few drops of essential oil for fragrance. This solution cuts through fingerprints and streaks on mirrors, windows, and glass surfaces. Apply with a microfiber cloth for a lint-free shine. For extra sparkle, buff the surface with a dry cloth after cleaning.
Gentle Surface Cleaner for Delicate Materials
For marble countertops and other porous surfaces, avoid vinegar-based cleaners as the acidity can damage these materials. Instead, mix a tiny amount of pH-neutral dish soap with warm water and apply with a microfiber cloth. This gentle approach cleans effectively without compromising delicate surfaces.
Advanced Cleaning Techniques
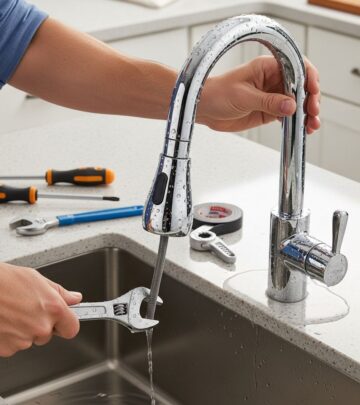
Addressing Hard Water Buildup
Hard water stains on faucet aerators and fixtures respond well to vinegar soaking. Remove the aerator if possible and soak it in undiluted vinegar for 15-30 minutes, then scrub with a small brush. For non-removable fixtures, apply vinegar with a brush to break down mineral deposits. This technique revitalizes fixtures and restores their appearance.
Tackling Bathroom Drains and Overflow Areas
The drain area and overflow hole in sinks trap significant buildup of gunk and bacteria over time. Spray your vinegar-based cleaner generously in these areas, allow it to sit briefly, and scrub with a small brush or old toothbrush. Pay special attention to the underside of the sink rim where hard water stains hide, using a melamine sponge for stubborn deposits.
Grout and Tile Restoration
While vinegar works for most surfaces, grout benefits from specialized acid-free cleaners that provide a gentler touch than vinegar. These products effectively clean porcelain, ceramic, and marble surfaces while reviving the original color of grout. Apply, let sit for a minute or two, then scrub and rinse thoroughly.
Natural Abrasive Scrubbing Solutions
For surfaces requiring more aggressive scrubbing power, create a paste using equal parts dish soap and baking soda. This combination provides just the right amount of grit to break down stubborn grime without scratching surfaces. Apply to sponges or cloths and scrub problem areas in sinks and bathtubs. The paste works exceptionally well on soap scum and baked-on debris.
Organizing Your Cleaning Spray Arsenal
Keep your homemade cleaning sprays organized and easily accessible by storing them in clearly labeled bottles in a convenient location. Group sprays by area—bathroom, kitchen, and general purpose. Maintain an inventory of your base ingredients so you can quickly prepare fresh batches when supplies run low. Store infusing vinegar mixtures in a cool, dark place away from direct sunlight to preserve the quality of the ingredients.
Storage and Shelf Life
Properly stored homemade cleaning sprays remain effective for several months. Keep solutions in sealed, opaque bottles away from heat and direct sunlight. Vinegar-based cleaners have an especially long shelf life due to vinegar’s natural preservative properties. Label each bottle with the preparation date and contents for easy reference. When a spray’s effectiveness diminishes, simply prepare a fresh batch using your stored base ingredients.
Cost Comparison: Homemade vs. Commercial Cleaners
Creating your own cleaning sprays results in substantial savings compared to purchasing commercial products. A bottle of distilled white vinegar costs mere dollars and produces multiple batches of cleaner. Citrus peels and herbs are free byproducts of food preparation. Dish soap and baking soda are inexpensive staples most households already have. Over a year, switching to homemade cleaners can reduce your cleaning product expenses by 80-90% while delivering equivalent or superior cleaning performance.
Environmental and Health Benefits
Beyond cost savings, homemade cleaning sprays offer significant environmental advantages. You eliminate plastic packaging from commercial cleaners, reducing landfill waste. The natural ingredients are biodegradable and won’t harm aquatic ecosystems when they enter water systems. For health-conscious households, homemade sprays eliminate exposure to harsh chemical fumes and toxic residues that can trigger respiratory issues and allergies. This is particularly important for families with children, elderly members, or pets who are more vulnerable to chemical irritation.
Customization and Fragrance Options
One of the greatest advantages of making your own cleaning sprays is the ability to customize scents according to personal preference. Experiment with different citrus combinations, herb pairings, or essential oil blends. Some popular combinations include lavender and lemon for a spa-like atmosphere, cinnamon and orange for a warm holiday scent, or rosemary and grapefruit for an energizing aroma. Keep notes on your favorite combinations so you can recreate them consistently.
Frequently Asked Questions
Q: Is vinegar safe to use on all surfaces?
A: No. While vinegar is safe for most surfaces, it should not be used on marble, granite, or other porous stone countertops as the acidity can cause damage. For these surfaces, use a mild dish soap and water solution instead.
Q: How long does it take to infuse vinegar with citrus and herbs?
A: The infusion process typically takes two to four weeks. The longer you allow it to sit, the more concentrated the scent and cleaning properties become. You can begin using it after two weeks if you prefer.
Q: Can I use tap water instead of filtered water?
A: While tap water works, filtered or distilled water is preferable as it doesn’t contain minerals that could leave residue on surfaces or interfere with the cleaning solution’s effectiveness.
Q: What should I do about the vinegar smell?
A: The vinegar smell dissipates completely as the cleaner dries. If you find the initial scent bothersome, add a few drops of your favorite essential oil to the spray bottle for a more pleasant aroma while cleaning.
Q: Can I store these sprays indefinitely?
A: Vinegar-based cleaners last several months when stored properly in sealed bottles away from heat and sunlight. Over time, the effectiveness may diminish slightly, but the solution remains safe to use.
Q: Are homemade cleaning sprays effective on tough stains?
A: Yes, especially when combined with baking soda paste or allowed to sit for a minute before scrubbing. For extremely stubborn stains, a melamine sponge or soft brush enhances the cleaning power.
References
- DIY Citrus Natural Cleaning Spray — HGTV Handmade. 2015-02-18. https://www.youtube.com/watch?v=q6BtFRT01B4
- How To Deep Clean Your Bathroom — HGTV Home Guides. https://www.youtube.com/watch?v=3UjPHCGqk_k
- Vinegar as a Natural Disinfectant — U.S. Environmental Protection Agency (EPA). https://www.epa.gov/
Similar Articles

Read full bio of Sneha Tete


