How to Change a Showerhead in 3 Easy Steps
Master the art of showerhead replacement with this simple DIY guide for homeowners.
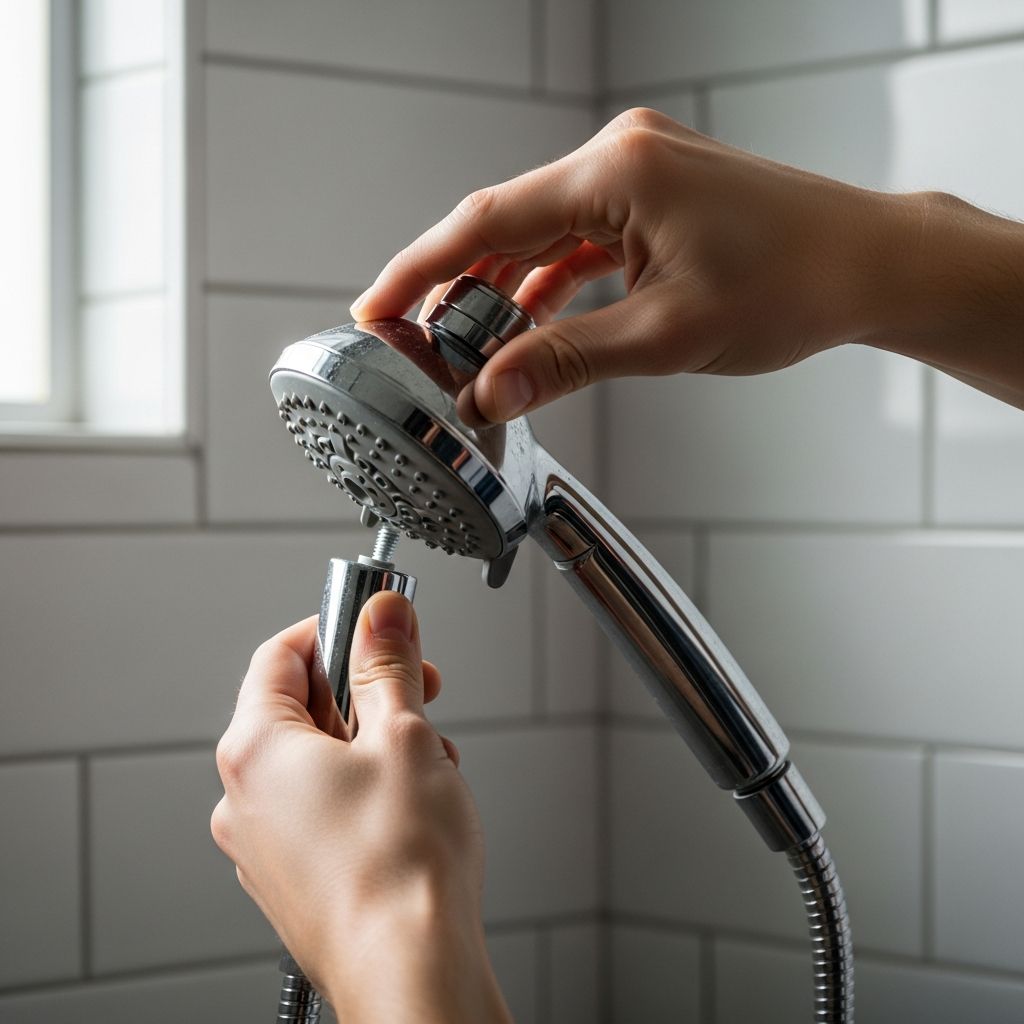
Replacing a showerhead is one of the easiest and most rewarding DIY projects you can tackle around your home. Whether you’re looking to upgrade to a water-saving model, improve water pressure, or simply refresh your bathroom aesthetic, changing a showerhead requires minimal tools and can be completed in less than 30 minutes. This comprehensive guide will walk you through the process, ensuring you achieve professional results without calling a plumber.
Why Replace Your Showerhead?
There are numerous reasons homeowners choose to replace their showerheads. Old showerheads often accumulate mineral deposits and sediment that reduce water pressure and affect spray patterns. Modern showerheads offer superior water conservation, delivering satisfying pressure while using less water than older models. Additionally, updating your showerhead is an affordable way to enhance your bathroom’s appearance and improve your daily shower experience. Whether you’re dealing with a drippy fixture, reduced flow, or simply want a style upgrade, replacement is straightforward and budget-friendly.
Tools and Materials You’ll Need
Before beginning your showerhead replacement project, gather the following items to ensure smooth execution:
Essential Tools
- Adjustable wrench or pipe wrench
- Clean cloth or soft rag
- Slip-joint pliers (optional, for stubborn fixtures)
- Flashlight (helpful for seeing the connection clearly)
Materials Required
- Teflon tape (plumber’s tape)
- New showerhead of your choice
- Towel or drop cloth (optional, for protection)
Having these items ready before you start prevents unnecessary delays and frustration during the replacement process.
Step 1: Remove the Old Showerhead
The first step in replacing your showerhead is safely removing the existing fixture. Most showerheads can be removed by hand, but some may require additional effort, particularly if they’ve been installed for many years.
Removing by Hand
Begin by grasping the showerhead firmly and attempting to rotate it counterclockwise. Many newer showerheads come off easily with manual effort alone. Apply steady pressure and turn slowly to avoid stripping the threads.
Using Tools for Stuck Fixtures
If the showerhead won’t budge with hand strength, employ your tools. Wrap a clean cloth or soft rag around the shower arm (the pipe extending from the wall) to protect the finish from damage. This protective measure prevents scratches to the chrome, brushed nickel, or other finishes. Grip the shower arm firmly with slip-joint pliers while using an adjustable wrench on the showerhead’s base. Rotate the wrench counterclockwise with steady pressure until the showerhead loosens and separates from the arm.
Important Safety Consideration
Always protect your bathtub or shower floor during this process. Place a towel on the surface below to cushion any dropped tools, preventing chips or damage to your fixtures. Many homeowners learn this lesson the hard way—a dropped wrench can cause significant damage to a newly installed or newly renovated tub.
Step 2: Clean and Prepare the Shower Arm
Once the old showerhead is removed, you’ll likely notice debris, mineral deposits, and rust accumulated inside and around the shower arm opening. Thorough cleaning at this stage is crucial for both water flow and proper installation of your new fixture.
Cleaning Process
Using your clean cloth or rag, wipe away all visible debris from both the inside and outside of the shower arm. Pay special attention to the threaded opening where the showerhead connects. Remove any rust, scale buildup, or other deposits that may have accumulated. This cleaning accomplishes two important goals: it improves water pressure and flow by clearing obstructions, and it ensures your new showerhead installs smoothly with a secure connection.
Why This Matters
Debris left on the threads can prevent proper sealing and may cause leaks in your new installation. Additionally, mineral buildup restricts water flow, so removing it can noticeably improve your shower experience even before installing the new head.
Step 3: Apply Teflon Tape and Install the New Showerhead
This final step involves preparing the threads and securing your new showerhead in place. Teflon tape, also called plumber’s tape or thread seal tape, creates a watertight seal that prevents leaks at the connection point.
Applying Teflon Tape Correctly
Locate the linear grooves, called threads, at the end of the shower arm where the showerhead will connect. Hold the Teflon tape and wrap it around these threads two or three times in a clockwise direction. This mirrors the direction you’ll twist the showerhead on, helping to set the tape securely. As you wrap each layer, press the tape firmly into the threads with your fingers. You should begin to see the threads showing through the tape—this indicates proper application.
Installation of the New Showerhead
Place your new showerhead onto the prepared shower arm threads. Twist it clockwise by hand first, applying gentle pressure to ensure the Teflon tape seals properly. Once hand-tight, you can use your wrench to tighten further, but avoid over-tightening, which can damage the threads or finish. The connection should be snug but not overly tight.
Different Showerhead Types
Installation methods vary slightly depending on your showerhead type. Standard wall-mount models typically install by hand as described above. Handheld showerheads may require connecting a hose to the arm and securing the holder to the wall. Rainfall or top-mount models may need professional installation if this is your first time working with them. Always refer to the manufacturer’s specific instructions that come with your new showerhead.
Checking for Leaks and Final Inspection
After installation, test your work before considering the project complete. Turn on the water and observe the connection point for any dripping or spraying. Watch for several minutes to ensure no water escapes from the joint. If you notice leaks, turn off the water, disassemble the connection, dry the area, add more Teflon tape if needed, and reattach the showerhead more securely.
Pro Tips for Success
Protecting Finishes
Always wrap tools with cloth or rags before using them on showerheads to prevent scratching chrome, brushed nickel, or other finishes. Your new showerhead will look better longer with this precaution.
Keep Extra Teflon Tape Handy
You may need additional tape if initial testing reveals leaks. Keeping a roll nearby means you won’t need to make a supply run mid-project.
Know Your Showerhead Type
Before purchasing a replacement, understand what type of showerhead you have and what you’re replacing it with. Compatibility issues can complicate installation significantly.
Common Mistakes to Avoid
Skipping the Cleaning Step
Rushing through arm cleaning can result in poor water flow and potential leaks. Take time to thoroughly remove all debris.
Over-tightening
Excessive force when tightening the showerhead can strip threads or crack the fixture. Snug is better than super-tight.
Forgetting Teflon Tape
Never skip the tape application. It’s inexpensive insurance against leaks and water damage.
Not Testing for Leaks
Always verify your work before walking away. Catching leaks immediately saves water and prevents damage.
When to Call a Professional
While showerhead replacement is generally straightforward, some situations warrant professional help. If your shower arm is corroded or damaged, if you’re replacing the arm itself (the pipe behind the wall), or if your showerhead type requires plumbing expertise, contact a licensed plumber. Additionally, if you encounter problems after following these steps, professional assistance ensures proper resolution.
Enhancing Your Bathroom Further
Once you’ve mastered showerhead replacement, you might consider other simple upgrades. Replacing aerators in bathroom faucets, updating caulk and sealants, or swapping out cabinet hardware are all beginner-friendly projects that enhance your bathroom’s appearance and functionality.
Frequently Asked Questions
Q: How long does it take to replace a showerhead?
A: Most people can complete a showerhead replacement in 15 to 30 minutes, depending on how easily the old fixture comes off and your comfort level with the process.
Q: Can I replace a showerhead without tools?
A: Many modern showerheads install by hand without tools. However, keeping a wrench nearby helps with stubborn fixtures or when you need to tighten the connection securely.
Q: What if water still leaks after replacement?
A: Turn off the water, disassemble the connection, inspect for debris on the threads, add additional Teflon tape if needed, and reattach securely. If leaking continues, a professional should evaluate the shower arm for damage.
Q: Do all showerheads fit all shower arms?
A: Most standard showerheads use the same connection size and thread pattern, but it’s wise to verify compatibility before purchasing. Specialty or high-end models may require specific arms.
Q: Should I replace the shower arm too?
A: Only if you notice corrosion, damage, or if you’re upgrading to a different style of showerhead that requires a different arm configuration. Most shower arms last many years without replacement.
Q: What’s the best type of showerhead for water conservation?
A: Look for showerheads with WaterSense certification, which use 20% less water than standard models while maintaining satisfying pressure and spray patterns.
Q: Can I install a rain showerhead myself?
A: Standard ceiling-mounted rain showerheads require different installation than wall-mounted heads. If this is your first time, professional installation may be advisable, though many modern designs accommodate DIY installation.
References
- How to Change a Shower Head in 5 Easy Steps — Bob Vila. 2024. https://www.bobvila.com/articles/how-to-change-a-shower-head/
Similar Articles



Read full bio of Sneha Tete