Maintaining Chest Freezer Condenser Coils
Essential maintenance guide for optimal freezer performance and energy efficiency

Maintaining Chest Freezer Condenser Coils: A Comprehensive Care Guide
The condenser coils in your chest freezer are critical components that work tirelessly to remove heat from the freezing compartment and maintain optimal temperature levels. Over time, these coils accumulate dust, debris, and other particles that can severely compromise their efficiency. Understanding how to properly maintain and clean these coils is essential for keeping your freezer running smoothly, reducing energy consumption, and extending the lifespan of your appliance.
Understanding the Role of Condenser Coils
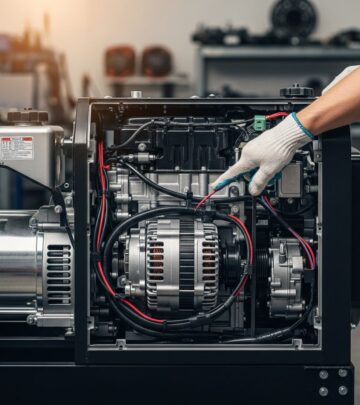
Condenser coils function as the heart of your freezer’s cooling system. These metal tubes are wound in a U-shaped grid pattern and work in conjunction with a fan to dissipate heat that has been collected from inside the freezer compartment. As your freezer operates, warm air is drawn across the condenser coils, where heat transfer occurs, allowing the refrigerant to cool and cycle back into the freezing chamber.
When condenser coils become clogged with dust and debris, they cannot effectively transfer heat away from the system. This forces the compressor to work harder to maintain the desired temperature, leading to increased energy consumption and potential equipment failure. Regular maintenance of these coils is therefore not just a matter of efficiency—it’s a matter of equipment longevity and cost management.
Why Regular Cleaning Is Necessary
In a typical home environment, condenser coils may not require frequent cleaning. However, certain conditions warrant more regular attention. Homes with significant pet traffic, particularly dusty environments, or kitchens that generate considerable grease and cooking residue should have their freezer condenser coils inspected and cleaned every two to three months.
Neglecting coil maintenance can result in several problems. The system must work harder to achieve proper temperatures, consuming more electricity and increasing utility bills. Additionally, excessive strain on the compressor can lead to premature component failure, resulting in costly repairs or complete appliance replacement. By implementing a regular maintenance schedule, you can prevent these issues and ensure your freezer operates at peak efficiency.
Essential Tools and Materials for Coil Maintenance
Before beginning any maintenance work on your chest freezer, gather the necessary equipment. Having the right tools makes the cleaning process safer and more effective.
- Vacuum cleaner with narrow nozzle attachment: Essential for removing loose dust and debris from the coil surfaces and surrounding areas
- Soft-bristled brush: A two-inch paintbrush or specialized refrigerator coil brush works well for dislodging stubborn particles
- Dust mask: Protects your respiratory system from inhaling dust and particles during cleaning
- Flashlight: Helps you inspect the coils thoroughly and identify areas requiring additional attention
- Phillips head screwdriver or drill: Needed for removing grille panels or protective covers
- Commercial degreasing cleaner (optional): Useful for removing stubborn grease and grime that ordinary vacuuming cannot eliminate
Safety Considerations Before Starting
Safety must be your primary concern when working with any electrical appliance. Before beginning coil maintenance, always unplug your chest freezer from the electrical outlet. This prevents the risk of electrical shock or accidental equipment operation during cleaning. The condenser coils remain connected to the refrigerator’s electrical components, making powered operation dangerous during maintenance work.
Additionally, allow some time for the coils to cool if the freezer has been operating recently. Although you’ve unplugged the unit, residual heat may still be present in the coil system. Wearing a dust mask during the cleaning process protects your lungs from airborne particles and dust that will be disturbed during the cleaning work.
Locating Your Chest Freezer’s Condenser Coils
Condenser coils in chest freezers are typically located in one of two positions: underneath the unit or along the rear panel. The location affects your approach to cleaning. Units with coils positioned underneath may have a removable toe guard at the front of the unit that provides easier access. Units with rear-mounted coils may require moving the freezer away from the wall to access the protective panel.
Consult your freezer’s owner’s manual to determine your specific model’s coil location. Some newer models may have sealed coil systems that require professional cleaning only, while others are easily accessible for homeowner maintenance.
Step-by-Step Cleaning Process
Preparation and Accessibility
Begin by unplugging your freezer and allowing adequate time for residual heat to dissipate. If your freezer has casters or wheels, unlock them to facilitate movement. Carefully pull the unit away from the wall, taking care not to damage the electrical cord or plug. If your freezer has a protective grille, front access panel, or toe guard covering the coils, locate the attachment points and remove these covers according to your manufacturer’s instructions.
Before removing contents, consider what you’ll do with frozen items. If cleaning will take longer than an hour or two, have another refrigeration unit or insulated cooler prepared to temporarily store perishable items.
Initial Inspection and Vacuum Work
Use your flashlight to inspect the exposed condenser coils. If they appear relatively clean without significant dust accumulation, you may skip to the final steps. However, if dust and debris are visible, proceed with cleaning. Use your vacuum’s narrow nozzle attachment to suction away loose dust and particles. Work systematically from bottom to top and left to right, ensuring you cover all accessible surfaces around the coils. Pay special attention to crevices and areas between the coil fins where debris commonly accumulates.
Brush Application and Debris Removal
After vacuuming, use your soft-bristled brush to dislodge stubborn particles that may be stuck to the coil surfaces. Work gently but deliberately, brushing directly on the coils and surrounding hardware. The brush should loosen compacted dust and debris that the vacuum alone cannot remove. Use smooth, controlled strokes to avoid damaging the delicate coil fins.
Final Cleaning Stage
Once brushing is complete, use your vacuum’s narrow attachment one final time to collect all loosened debris. This prevents particles from being reintroduced into the coil system or circulating in your home. If significant grease or stubborn grime remains, you may apply a commercial degreasing cleaner specifically designed for refrigerator coils. Always spray the cleaner onto your brush rather than directly onto the coils, and allow it to dry completely before reassembling.
Reassembly and System Restoration
After cleaning is complete, carefully reinstall any protective panels, grilles, or toe guards that you removed. Ensure all components are securely fastened according to manufacturer specifications. Move your freezer back to its original position against the wall, being careful with the electrical cord. Plug the freezer back into the electrical outlet and allow it to cycle through its initial startup sequence. If you had stored contents elsewhere, return them to the freezer once normal operation resumes.
Establishing a Maintenance Schedule
| Operating Environment | Recommended Cleaning Frequency | Special Considerations |
|---|---|---|
| Normal home environment | Annually or as needed | Inspect coils seasonally |
| Homes with pets | Every 2-3 months | Pet hair accelerates buildup |
| Particularly dusty environments | Every 2-3 months | Environmental dust requires frequent attention |
| High-grease cooking environments | Every 2-3 months | May require degreasing treatments |
Frequently Asked Questions
How often should I clean my chest freezer condenser coils?
In average home conditions, annual inspection and cleaning is sufficient. However, homes with pets, significant dust, or cooking grease should clean every two to three months. Check your owner’s manual for specific recommendations for your model.
Can I clean the coils without unplugging the freezer?
No. Always unplug your freezer before cleaning condenser coils. The coils are electrically connected and working with a powered unit poses serious electrical and safety risks.
What should I do if I can’t access all surfaces of the coils?
This is normal. Focus on cleaning the accessible areas thoroughly using your vacuum and brush. Most of the problematic dust accumulation occurs on exposed surfaces, so cleaning these areas typically provides significant efficiency improvements.
Is commercial degreasing cleaner necessary?
For most households, vacuuming and brushing are sufficient. Degreasing cleaner is beneficial only in homes with significant cooking grease accumulation or when stubborn residue remains after regular cleaning.
How long does freezer coil cleaning typically take?
Most coil cleaning tasks can be completed in 15 to 30 minutes, depending on coil location and debris accumulation level. Budget additional time for moving the freezer and allowing components to cool.
Energy Efficiency Benefits
Maintaining clean condenser coils directly impacts your freezer’s energy consumption. When coils are clogged, the compressor must work harder to maintain proper temperatures, consuming significantly more electricity. Studies indicate that clean condenser coils can reduce energy consumption by 10 to 25 percent compared to heavily soiled coils. This translates to tangible savings on your utility bills over time, making regular maintenance not just beneficial for equipment longevity but also for your household budget.
When to Seek Professional Help
Some chest freezer models feature sealed condenser systems that manufacturers recommend only professionals should service. Consult your owner’s manual to determine if your model falls into this category. Additionally, if you discover that your freezer isn’t maintaining proper temperatures even after thorough coil cleaning, or if you notice refrigerant leaks or other mechanical issues, contact a qualified appliance repair technician. Professional service ensures your warranty remains valid and complex problems are resolved safely.
Conclusion
Regular maintenance of chest freezer condenser coils is a simple yet highly effective way to ensure your appliance operates efficiently for years to come. By dedicating a small amount of time to this straightforward maintenance task, you protect your investment, reduce energy costs, and maintain optimal food storage conditions. Implement a regular inspection schedule based on your home environment, and your chest freezer will continue to provide reliable service.
References
- How and When to Safely Clean the Condenser Coils — JennAir Product Help. Accessed 2026. https://producthelp.jennair.com/Refrigeration/Full-Size_Refrigerators/Product_Info/Cleaning_and_Care/How_and_When_to_Safely_Clean_the_Condenser_Coils
- How to Clean Refrigerator Coils in 5 Easy Steps — Sloan Appliance. Accessed 2026. https://sloanappliance.com/how-to-clean-refrigerator-coils/
- How do I clean condenser coils? — K2 Scientific. Accessed 2026. https://knowledge.k2sci.com/knowledge/how-do-i-clean-condenser-coils
- How To Clean Commercial Refrigerator Condenser Coils — HABCO Manufacturing. Accessed 2026. https://habcomfg.com/how-to-clean-commercial-refrigerator-condenser-coils/
- VIDEO: Cleaning the Condenser Coils — Whirlpool Product Help. Accessed 2026. https://producthelp.whirlpool.com/Refrigeration/Full-Size_Refrigerators/Product_Info/Videos/VIDEO:_Cleaning_the_Condenser_Coils
Similar Articles


Read full bio of medha deb


